Feastock 2013 – Rock’n’Roll photography
The Feastock festival is a unique mix of a giant backyard party and a full-on Woodstock style festival. It is an annual event in Fea Street, Dunedin.
I was lucky enough to be playing there this year, and also got to take some photos…
(All shot on a Canon 6D)
First up is the Laon, a Christchurch band that plays some pretty wicked psychedelic stuff. This shot works due to the lights providing glare, and gives a general idea of the layout of the stage. This is shot with a 20mm lens – I’ve reached as far as I can over the edge of the stage, and taken the photo blind (without looking through the viewfinder).
Here we have keytarist Hong An. I’ve accentuated the natural light on him by darkening the left edge of the frame a little. This was shot with the Pentax 135mm lens (the one that had minor surgery described in the earlier post).
One reason for putting many of these shots in black and white is that the coloured lights on the smoke and the blue-and-yellow roof in the background respond very effectively to colour control, either in Lightroom or by using the colour ‘filters’ in Silver Effex Pro. By selectively emphasising the blue or red channels you can get very different effects, allowing more separation between the subject and background.
To get this shot I’ve used a 20mm prime lens and reached out with my right arm until it was close to Hong An’s foot, and shot blind. I’d take shot and then quickly review the LCD screen to see if my targeting was accurate. I didn’t use Live View because of the delay in the autofocus working. Actually I’ve got a pretty good idea of what the camera will ‘see’ – this is an advantage of using prime lenses – you get a really good idea of the field of view of your favourite lenses. The stripes on his pants function as leading lines, and there’s some nice backlighting.
You can’t see his face, but it’s a great action shot anyway.
This is the Dunedin band The Males, using an old M42 Pentax 55mm.
I’ve shot a burst here and managed to capture a great action moment, where the bass player’s movements work well against the light, and I’ve got separation from the background by using the right coloured filter in Silver Effex.
This is using the Pentax 135mm lens again. It’s a balancing act between using an open aperture to separate the subject from the background, yet not going too wide since I’m using a manual focus lens on a subject who is dancing about.
Here’s Richard Ley-Hamilton from The Males. As you’ve seen in the other photos, he’s usually dancing about on the stage, but when he sings he needs to stand at the mic. To give him the energy he deserves (the energy we can hear, but that won’t be communicated in a photo) I’ve given him an extreme cant in the shot. Again this one was done by reaching across from the front of the stage and taking the photo blind.
Some overall notes on rock’n’roll photography…
Auto-focus is a blessing and a curse. It’s really easy when the focus latches on to the subject, but there are also lots of other items that can confuse the auto-focus such as smoke and mic stands. I have twenty or thirty photos that have a mic cable in perfect focus, with an out of focus musician behind it. It would be really easy to miss some really good shots if you rely too much on autofocus.
Pre-focusing is really useful when using manual focus – focus on a spot that you hope the musician will move into and hit the shutter when they move into focus.
Shoot bursts. You need to capture those precious moments, and the performers don’t stay still for you.
Long lenses are good for getting CUs, but the really good shots usually come from wider lenses. Wider lenses are inherently more present, more energetic. Longer lenses are just, well, more distant.
Learn to shoot blind. Often the shot requires that the camera is in a position that you just can’t reach without shooting blind, and Live View shooting is just too slow. Using a well-loved prime lens will help.
Aramoana Dawn – One Prime Lens
I arrive at the carpark at Aramoana just around dawn. The carpark is empty, except for what appears to be a horse transporter (what’s a horse transporter doing here? There were no horses on the beach).
My self-imposed mission is to look for a shot inspired by Ansell Adams’ great shot of sand dues taken in Death Valley (http://onlinephotoinstitute-masters.com/adams/#jp-carousel-377). This requires the sun to be low in the sky – adams took his shot at dawn, to get the sun low across the dunes. When I left home I thought the sky was going to be clear, but now that I’m in Aramoana there is quite a lot of cloud cover. I’m hoping that there might be some breaks in the clouds where the sun peeks through.
I get out of the car, and pick up the camera bag. It’s quite heavy, with a good selection of lenses and two bodies so I can quickly switch between wide-angle and fisheye. I look up a the sky again. I can tell what’s going to happen – most of the time the light will be dull, but there will be occasional moments of magic when the sun comes through. And then I’ll be running to get to the best places before the light goes again. I don’t want to be running up sand dunes with a heavy bag, so I take a risk. I get out the 6D with a 20mm prime lens, and leave the rest in the car. The 20mm is a lovely lens – the image quality is much better than any of the zoom I have, and the focal length is just right – it’s wide, but not so wide that the photos are dominated by the extreme focal length. Sometimes with a very wide lens it seems that it’s the lens that took the photo, not the photographer.
it’s a short walk top the beach (the north side, not the spit), and the light is dull. Here’s the first shot of the day – an interesting piece of driftwood. But the light is dull, and really there’s nothing going on here. It’s a dull photo. Actually, to be more specific, the light is actually really nice – it’s a calm, even light, and the morning is still and not too cold. But it’s not photogenic at all.
I turn left, and head north. The light stays dull, but I’m hopeful.
I sit on the sand for a while. It’s a really nice morning. it’s a little cold, but I’m wearing a down jacket, so I’m warm, and the place is silent and deserted except for waves.
Suddenly there’s a burst of sunlight! I move over near the sand dunes and find the light is picking out some penguin tracks in the sand. With the camera horizontal I can’t get the top of the cliffs in as well as the penguin tracks, but turning the camera vertical I get the shot below.
At the time I don’t think much of this one, but when I get home I’ll discover the luminous quality to the sky that has come from the clouds that are usually blocking the sun. Actually this is possibly the best shot of the day. I’m still thinking of my self-imposed mission to get a riff on Adam’s Death Vally shot, but there just are not an expanse of dunes here, so I’m not going to get it. What I d=need to do is to jettison my preconceptions and work with what I’ve got – sand and rocks.
Moving further down the beach I find a crest of sand near a rock. This is actually just like Adams’ shot, except much smaller. I sit and wait for the sun to break through again.
When the sun comes it highlights a series of bird tracks along the crest. With the rocky cliffs in the background I’m happy with this shot.
It occurs to me that I should point the camera downwards, just getting the sand. Sort of like Adam’s shot in miniature. Because I’ve only got the 20mm, I can’t avoid getting some rock in the shot. This on is probably more like Adams’ one, but I prefer the one with the cliffs in the shot.
Now I feel a sense of release. I’ve got the shot of the mission. It’s not exactly what I’d set out hoping for, but it’s what the universe offered me. Now I’m feeling looser. The sun is still shining, so I find myself running up the sand dunes of a better angle.
The sand is soft and dry, and for every two steps I take up I seem to slide back 1.999 steps. Eventually I get to some dune grass and manage to make some progress, but it’s hard work. The sun is actually quite hot, so now I’m sweltering in the down jacket, and I’m really glad I left the camera bag in the car.
At the top of the dunes, under the cliffs, there are no photos. I turn around and look back down. I can’t get a decent composition here. I know that the large rock is too central, but panning the camera to either side isn’t working either. It’s never going to work. It’s pretty, but so what.
The sun goes away.
Getting down the dues is a lot easier than going up. I’m happy though. At least I know I’m not missing anything up there, and I think I’ve got a shot in the camera that I’m happy with. I begin walking back along the beach
As I’m walking the sun comes out and highlights a series of tracks – there are fading tracks from humans on the beach yesterday, crossed with fresh penguin tracks heading towards the water. apart from a nice composition, it’s a nice idea for a photo.
As I near Keyhole Rock the sun comes out again, and I have to run to get into position. I’m stopping every now and then since it’s hard to tell when the sun will disappear, and if I’m not careful I’ll get nothing at all. There’s a large rock just in front of Keyhole rock and I go to the right of it. It’s just as I come around the edge that I get this shot, which has nice framing with the sand and foreground rock giving some depth to the image.
What I like is the contrast between the white sand and the black rock. This inspires me to get a shot of the base of Keyhole.
Back on the main beach, I walk back to the driftwood in the first shot, but just nearby is this piece, which has much more interesting textures. The light is much more interesting now. It’s OK, and it makes a nice bookend to the set, but I don’t think it’s a really great shot.
I think the points to remember for this experience are about the importance of running with what you actually have in front of you, rather than wishing for something that’s not there. You can mess up an otherwise great shot by trying to make it into something that it’s not (and I think there is a lesson there which extends into the rest of our lives as well).
In this case, aiming to replicate Ansell Adam’s shot got me out to Aramoana at dawn (and I am not a morning person). But once there it was important to see the place with fresh eyes, and look at what the universe had given me. It’s not unlike a score to a piece of classical music. Peter Wispelway and Pablo Cassals have both done radically different interpretations of Bach’s Cello Suites. The writing that Bach made on a piece of paper prompts both performers into different performances. Taking a photo that impresses you and using it as a ‘score’ for your own work can prompt you to some wonderful images, but only if you are prepared to let go of the ‘score’ and improvise.
Using one prime lens worked well. With no options other than to use the focal length that was on the camera, well, it seems like there is just one less thing to worry about. You can’t zoom in, so you get closer (always a good thing). WIth only one piece of gear, but a well chosen piece, most of my energies were directed into he creative flow. And it’s easier to run!
Perhaps the other lesson is how important it is to seize the light. When the sun was behind the clouds the light did not yield decent photos. What was good about this morning was that when the un came out the sky was still filled with clouds in the otehr directions, and that’s what has given me the luminous sky in the second shot in the series.
Canon 6D Review – a subjective look
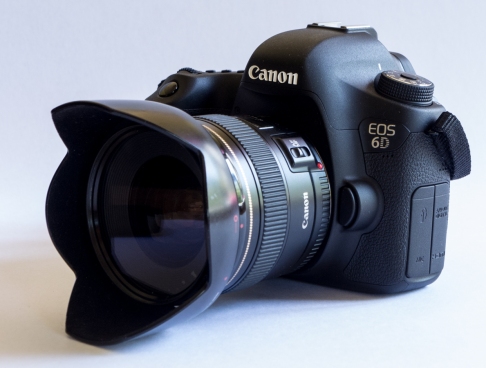
This is going to be a quick review. There are other reviews out there that cover the new 6D in great detail, so I’m not going to repeat that material. Instead I’m going to give my subjective views on the camera.
If this is going to be a subjective review, you should know something about me. Many, many years ago I was using a Nikon F3, which was then the greatest, newest camera ever. But when hard financial times struck I sold the F3 and brought an ancient Nikkormat EL (a camera that was already ancient when I got it). The Nikkormat had none of the fancy technological features of the F3, but it did everything I asked of it – aperture priority automatic with the option of manual control. The Nikkormat was built like a tank, and had a nice viewfinder, and was easy to use. I never missed the F3.
Fast forward to today. The 6D is Canon’s budget option for a full frame DSLR. A camera intended for those who are unwilling to part with the cash for a 5DIII, and in direct competition to the Nikon D600.
Making a budget version of an expensive camera requires compromises, not only for manufacture costs, but also so that the cheaper model does not cannibalise the sales of the more expensive one. The issue is where the camera designers choose to make those compromises.
In the case of the 6D, the image quality is excellent. The main points of difference between the 6D and the other cameras is that the 6D has fewer autofocus points, writes to a single SD card, and has no headphone socket. Quite frankly, for my use, this feels a lot like comparing the Nikkormat to the F3. There are a bunch of features that the cheaper option is lacking, but none of them impact on me as a photographer.
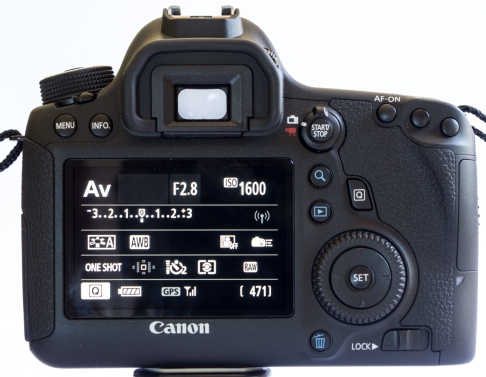
In terms of useability there are no great surprises. This is a Canon DSLR, and you hardly need to consult the manual. A few things are in different places, but nothing that you won’t get used to. The camera is also smaller and lighter than the competition.
The autofocus system is not as good at tracking fast moving subjects as the systems in the D600 or 5DIII, but in poor light the 6D’s autofocus outperforms the Nikon’s, and to me that is more useful. The fact of the matter is that most of the time I leave the centre point selected, and use that to lock the focus, so I’m not worried about the meagre number of autofocus points.
It seems that I’m often shooting at the point where there is barely enough light. Actually it’s been like this as long as I can remember – probably because as technology has advanced it has enabled me to get closer to the shooting that I’ve always been aiming at. From looking at a lot of student work, I don’t think I’m alone here. I’m often looking at student images that represent great opportunities that have not produced great images because the shots have been ruined by excessive noise or camera shake. Pretty much any camera will work well in good light at f:8 and an ISO of 200, but how many can get a decent image in adverse conditions?
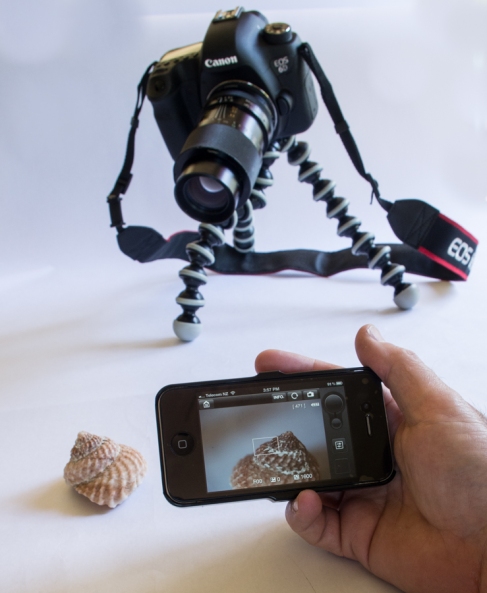
There are a few bells and whistles that the 6D has that are a little surprising. It has built in GPS, but this drains the battery, and it has located several of my photos in the harbour. More useful is the built-in Wi-Fi, which allows a smart phone or a computer to control the camera. In the shot below you can see the camera ‘tethered’ to my iPhone, allowing me to control the exposure settings and click the shutter, as well as see through the lens. What would be really useful though would be to use this with an iPad, where the larger screen would be a big advantage, not only for tethering, but also for reviewing images after they have been shot. I will note however that it was a very cumbersome process to set up the tethering to the iPhone, and although I got it to work in the end, it did take quite a while, and I’m not exactly sure how I got it to work.
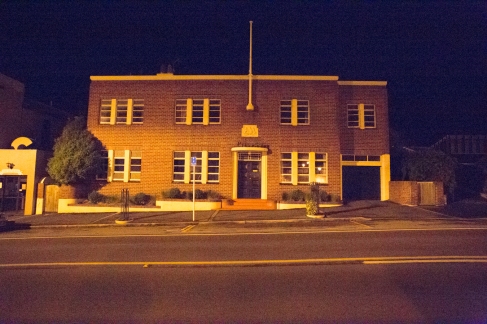
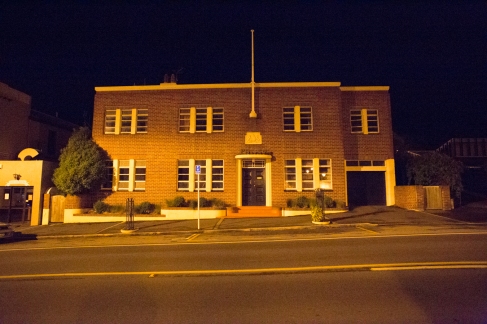
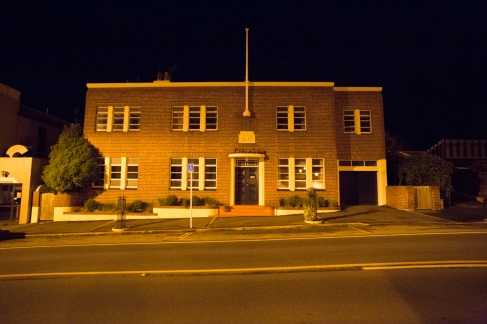
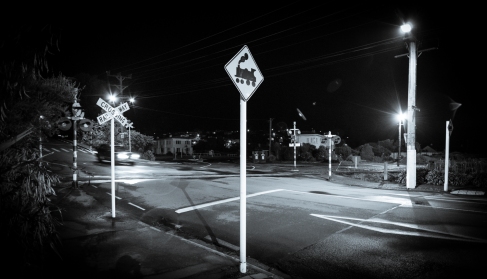
I took the camera for a walk around Port Chalmers late at night to put it to the test (images are below).
At the highest ISO, a ridiculous 102400, the images are pretty noisy, especially in the mid tones. There is no noise at all in the blacks. Detail is poor. This really is a setting for emergencies only. But that is to be expected.
However, the image looks cleaner to me than the highest ISO shots I’ve taken with 60D or 7D cameras, which only reach 12800, and is definitely cleaner than the 51200 setting on my Pentax K-5.
The real surprise is the quality the camera produces at only one stop down, a still-ridiculous 51200. Viewed at 100% there is noise, but the pattern of the noise is not really awful (as it is on the Pentax). Zoom out until the image fills the screen, and the noise is only noticeable in the areas of smooth mid tones. Notice the roadway in the images of the police station below.
Back down to a moderate ISO of 6400 or 3200 and the noise resembles a fine grain pattern, and is only visible at 100%. For my use, these images are perfectly useable, and I doubt if the noise would be visible in an A4 print. Certainly for web use these images are fine.
Overall conclusion – I’m very pleased with the camera. It delivers in all the key areas, and I don’t miss the points that make it more affordable. I’d question the wisdom of spending the extra money on a 5DIII unless you had a clear need for its features. Certainly I’d prefer the 6D to Nikon’s offerings, and I suspect that the 6D would even suit me better than Nikon’s D800. I think this camera sets a new benchmark in terms of image quality for money spent. If your concern is the best image quality at the lowest price, especially if you work in low light, this is a great camera.
Below: the Port Chalmers Police station, which is not well lit at all, and provided a good test subject. The top image is at 102400, the next at 51200, and then 25600.
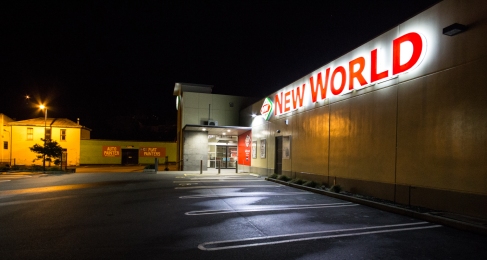
Below: Outside the supermarket at ISO 6400. There’s a little noise in the distant buildings, but even at 100% it’s not very objectionable.
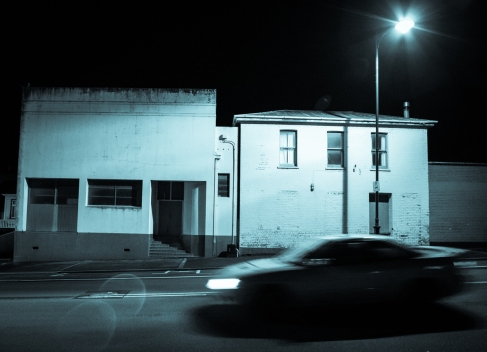
I’ve worked on this one in Lightroom, but only to change the colour – there is no noise reduction applied. This is also at 6400. The noise is definitely there, but it’s not a problem. It looks a lot like film grain.
Although there is noise in this shot, because I’ve put it into black-and-white and I’ve worked on it with the tone curve the noise looks a lot like film grain, and I don’t see it as a problem at all. 6400 again.
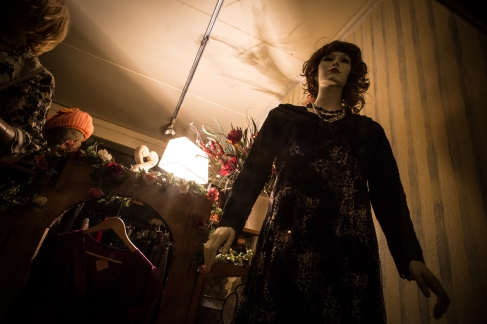
In the last shot, a mannequin in a shop window (after Atget) taken at 3200 there’s a touch of noise in the lighter shadows, but you really need to look for it at 100%.
Going full frame on a tight budget
I was going to write this up as a proper comparison review, but I think it works better as a story. The moral of this story is to know exactly what it is that youcan purchase more wisely if you know exactly what you want your camera to do.
I decided to go to a full frame camera. The use of full frame sensors offers great low light performance and really good control over depth of field. If you are someone from my generation it kind of makes you feel like the lenses are behaving the way they are supposed to. The key to making an economically sensible camera purchase is to know exactly what you want from the camera. These days all the major manufacturers make great cameras, but some are better fits for individual approaches than others. Look for the camera that seems to have been designed with you in mind.
I decided to go for the Canon 6D. This camera has the same core functionality as its more expensive sibling, the 5D mark III, but less a few bells and whistles. Perhaps if I was a sport photographer I’d miss the more sophisticated autofocus system in the more expensive camera or the competing Nikon D600, but I’m not, and I don’t. What is important to me is low light performance. It always seems to work out that I’m trying to take a hand-held photo right at the edge of the cameras low light performance (and, from looking at student work, I think a lot of other people are in the same boat!). The Canon 6D is a relatively no-frills camera (at least compared to other models at the same price point) with really good image quality and low light performance. Sounds like a camera designed for me!
The trouble is that in moving to a full frame camera you need to update all your lenses. If money was no object I’d just buy the 16~35 f:2.8 L series lens and the Tamron f:2.8 24~70 stabilised lens, but those two nice lenses would cost more than the camera. In fact, the budget that I needed to work on gave me enough for a body, but very little left over for lenses.
Again the solution is to know exactly what you need. Most of my shots involve wide angles, and as I mentioned, low light performance is important. I’ve been noting the focal lengths that I’ve been using on my Pentax K-5, and I’m consistently using the wide end of by 10~20mm zoom. In fact I think I’m using the wide end because that’s as far as the ring goes, and I’d be better off using a setting of around 12mm or 13mm. At that length, the lens itself doesn’t dominate the image, and my choice of angle is what makes or breaks the image. At 10mm it tends to be the drama of the ultra-wide angle that sells the image, and I want my photography to be more about my vision than a technical gimmick.
Converting 12mm or 13mm to full frame focal lengths that means I want a 20mm lens, and because I tend to work in poor light, it should ideally be a fast lens.
The other lengths I use are a short telephoto for shots of people, and a slightly-wider-than-standard length for buildings.
My first purchase, because it was cheap, was a used Canon 20~35mm zoom. I was influenced by Ken Rockwell’s review of this lens (http://kenrockwell.com/canon/lenses/20-35mm.htm). Unfortunately, while Ken often has some wise things to say, he also says things that are quite wrong, and says them with such complete conviction that they seem very believable. In this case I think he got the lens wrong. To handle, the lens is certainly light, but feels flimsy and cheaply constructed. The lens performs adequately, but never brilliantly, and has very significant distortion and chromatic aberration in the corners. Ken mentions the in-camera correction, but fails to mention that this degrades an already less-than-stellar performance further. It’s inexpensive, and you get what you pay for.
Then I came across a used 20mm f:2.8 Canon prime lens for around $NZ450. This lens looks very similar to the 20~35, but feels a lot more solid and better constructed. Also it’s faster, as prime lenses usually are. Comparing the two lenses, the prime is significantly sharper when both lenses are at their best (in the centre at f:8), and the prime lens is far superior in the corners. The prime does vignette when it is wide open, but I can live with that since I often add a little vignetting to images in Lightroom anyway. The prime lens completely out performs the zoom in every respect (except the ability to zoom). So the zoom will soon be for sale on Trade Me – it will be great for someone on a tight budget, but the prime suits me better..
For a short telephoto I already had the perfect lens in my cupboard – an old Tamron SP 90mm f:2.5 prime lens. This is a great focal length for people shots, and this lens is one of Tamron’s best. It’s razor sharp, fast, has great colour, and even has a reasonable macro performance. All I needed was an appropriate adaptor. The lens does not autofocus, and does not record the aperture in the EXIF data, but I can live with that. Manual focussing seems to help me concentrate, and since I’m not shooting sports it is not a problem.
To replace the standard-ish lens I picked up an old 28mm Tamron lens for $NZ25, again manual focus, but I tend to use this on buildings, and they don’t move around very much. I also had, in the cupboard, an ancient Pentax M42 50mm with an adaptor and a Pentax 135mm K mount lens* that also have wonderful optics. I think for anyone on a tight budget who doesn’t want to sacrifice picture quality, you need to be looking at vintage manual focus lenses. While there are plenty of lemons out there, there are also lenses that are the equal (or better) than the best lenses available today, manufactured to higher standards and with beautifully damped focus rings. They are less convenient, and really not useful for action shots, but I think that’s a reasonable compromise.
The result is that my main lens has all the convenience of a modern lens: autofocus and aperture set by the camera, and recorded in the EXIF data. The lenses I use less frequently have superb optical quality at the cost of manual focus. The thing I’ve noticed about using prime lenses is that you tend to see differently, especially if you go out shooting with only one lens. With everything else stripped away your choices are what to point the camera at, and what angle to use – core photographic choices. With fewer choices, I seem to see more.
The main point is that, if you know exactly what you want a camera to do, you can tailor your purchases to exactly that, and minimise the outlay.
*Pentax K mount lenses can mount, with an adaptor on Canon EF-S bodies (650D, 60D, 7D, etc) but don’t work on full frame bodies. The EF-S mount has the mirror further back, but when you put a K-mount lens on a full frame body the aperture lever will strike the camera’s mirror. The solution sounds rather harsh – take the back off the lens and cut the aperture lever off. This ruins the lens in terms of using it as a K mount lens, but the fact is that an M Series lens is actually a pain to use on a Pentax body anyway – you need to use manual exposure and meter by using the depth-of-field preview button. With the aperture lever snapped off you could use Aperture priority automatic. As you stop the lens down the viewfinder would get darker, but that’s probably better than the other way.


